In some cases, sending invoices to multiple or alternative emails is necessary. This may be the case if your business customers have a designated billing email that needs to receive all the invoices to be processed at a later stage.
Sufio not only allows you to set custom terms for invoice sending but also to automatically send invoices to multiple or alternative email addresses of customers in your Shopify admin.
As there is no dedicated field in Shopify that would allow you to enter a custom recipient email address, Sufio can source the email addresses from any of the following Shopify objects:
The easiest option to add custom recipient emails for your customers is to add the addresses as tags for specific customers in your Shopify admin.
The tag with the email should be written in the following format: email: XXXXX. For example, a customer that has requested to receive invoices to billing@acmecorp.com should be tagged as follows: email: billing@acmecorp.com.
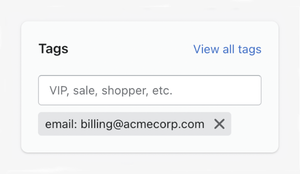
To add a tag with the email:
- In your Shopify admin, go to the Customers page.
- Click on a customer you want to add the email to.
- In the Tags section, enter the email tag in the format shown above, or select it from the list of existing tags. If you enter a new tag, it will automatically be created for future use.
- Click on the Save button to apply your changes.
If adding tags to multiple customers is necessary, you can use the available bulk actions.
Once all this is complete, scroll down or click here to finish the setup.
If you need a more robust solution, you can create a metafield definition called email and then set the metafield value for each customer to the email address you want to store.
You can create this metafield definition on the Customer object. If you’re a Shopify Plus merchant using Company or CompanyLocation objects, you can also create metafield definitions on those objects.
To create a metafield definition:
- In your Shopify admin, go to the Settings → Metafields and metaobjects page.
- Click on Customers, Companies, or Company Locations, depending on which part you want to add the email to.
- Click on the Add definition button.
- In the Name field, enter
email. - From the Type dropdown, select the Type → Email (Single line text) option.
- Optionally, in the Validation section, check the Unique values only checkbox.
- Click on the Save button to apply your changes.
Now, open the part of the store where you added the email metafield definition—for example, you click on a customer you want to add the email to. Here, you have a new email field available where you can enter the custom recipient email and click on the Save button to apply your changes.
Once each recipient has their new custom email added, finish the setup by contacting our support team.
Once you have added the email addresses in your Shopify admin, please get in touch with our experienced support team to finish the setup in your Sufio account. Then, all the invoices will be sent to the email specified in the tags or metafields, or, if not defined, to the customer's email as per default.
Note
Custom email recipients are only available in our Premium or higher plans. To help you set them up, please contact our support team. We'll be happy to help you!
Professional invoices for Shopify stores
Let Sufio automatically create and send beautiful invoices for every order in your store.
Install Sufio - Automatic Invoices from the Shopify App Store